Hey friends! With the holiday season fast approaching, I know many of us are eager to whip up festive treats that bring joy and color to our gatherings. Today, I’m excited to share a fun, indulgent, and visually stunning recipe: Christmas Tree Brownies. These aren’t your average brownies—they’re a delightful combination of rich chocolate, vibrant decorating, and a dash of holiday magic that’ll wow your family and friends.
Whether you’re a baking newbie or a seasoned pro, I’ll guide you step-by-step through creating this adorable holiday centerpiece. Plus, I’ll reveal tips, common pitfalls, and even some fun variations to personalize your Christmas tree brownies!
What Are Christmas Tree Brownies?
Imagine a traditional fudgy brownie transformed into a charming miniature Christmas tree! These treats combine dense, chocolatey brownies with colorful icing or frosting, sprinkles, and edible decorations arranged in the shape of a coniferous tree. They’re perfect for holiday parties, family get-togethers, or a sweet gift for neighbors.
Key Features of Christmas Tree Brownies:
- Flavorful: Rich chocolate base with sweet toppings
- Visually appealing: Eye-catching Christmas tree shape
- Customizable: Decorate with different colors, sprinkles, candies
- Portable: Easy to serve and share
Materials Needed
Before diving into the baking process, let’s get all our supplies ready. Having everything prepared ensures a smooth experience.
| Item | Details / Variations | Quantity/Size |
|---|---|---|
| Brownie mix or ingredients | Store-bought or homemade | Enough for 24 brownies |
| Vegetable oil | For baking (per recipe instructions) | As specified on box or recipe |
| Eggs | For binding | Per recipe |
| Water | Depending on recipe | As required |
| Freshly baked brownies | For shaping | 1 large batch or pre-baked brownies |
| Green frosting or icing | For the tree color | 2-3 cups |
| Piping bags and tips | Star or leaf tips for decoration | 2 sets |
| Decorative sprinkles and edible candies | To mimic ornaments | Assorted colors and shapes |
| Edible glitter or shimmer | Optional, for extra sparkle | 1 small jar |
| Candy canes, mini marshmallows, chocolate chips | Additional decorations | As desired |
| Plastic knife or cookie cutter | To cut out mini tree shapes | 1 |
| Decorative toppers (stars, bells) | For top of the tree | 1 per brownie |
Step-by-Step Guide to Making Christmas Tree Brownies
Now, let’s bring out the baking magic! Follow these steps to create irresistible holiday treats that look as good as they taste.
1. Baking the Brownies
Tip: Use your favorite brownie recipe or a box mix for quick results. Remember, the brownies need to be sturdy enough to cut into tree shapes.
- Preheat your oven to 350°F (175°C).
- Prepare your brownie batter according to your recipe or package instructions.
- Pour into a greased baking pan (preferably 9×13 inches for uniformity).
- Bake for the time specified, usually 20-25 minutes, until a toothpick inserted in the center comes out clean.
- Cool thoroughly before proceeding.
2. Cutting Out the Tree Shapes
Tip: Use a sturdy plastic or metal tree-shaped cookie cutter for precise cuts.
- Once cooled, use the cookie cutter to cut out small triangles or Christmas tree-shaped pieces.
- Enjoy the trimmings for snacking; no waste here!
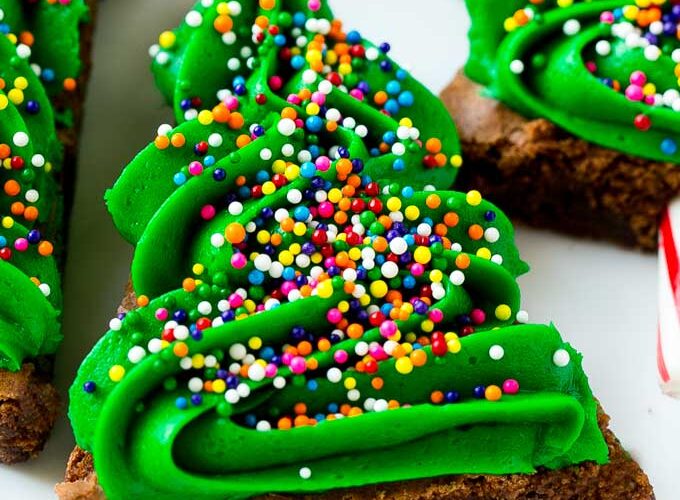
3. Assembling the Trees
- Place each brownie triangle on a decorated serving plate.
- Cover the top with a generous swirl of green frosting using a piping bag fitted with a star or leaf tip.
- Start from the bottom and work upwards, gently pressing sprinkles or candies into the frosting to resemble ornaments.
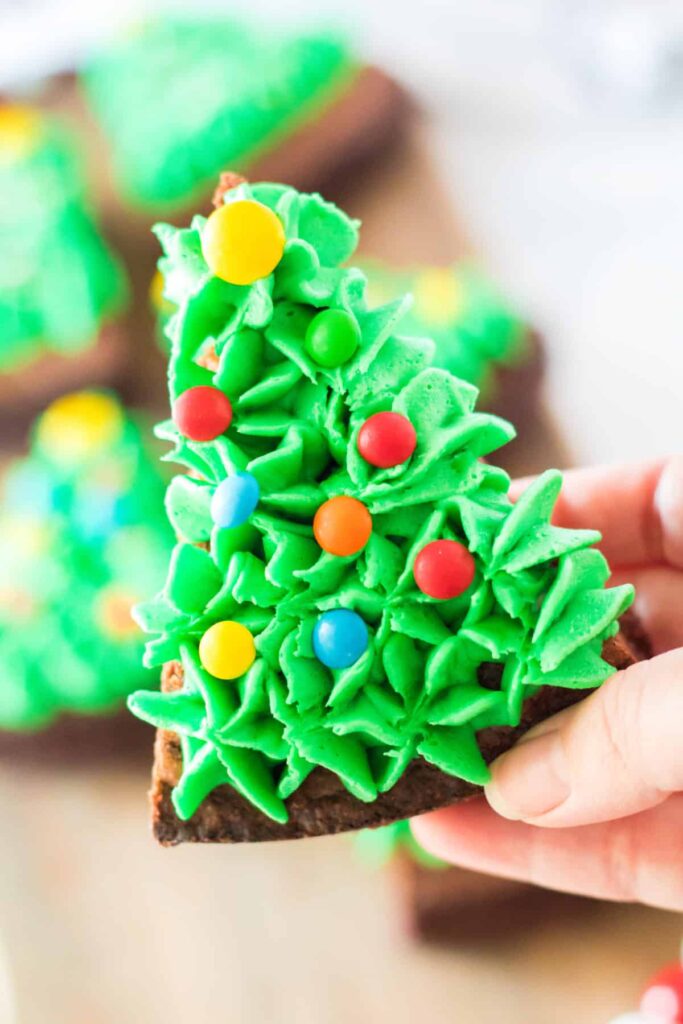
4. Decorating the Trees
This is the fun part! Be creative and festive:
- Use contrasting colored frosting to pipe “string lights” or garlands.
- Add mini candies, sprinkles, or crushed cookies as “snow” or decorations.
- Top each tree with a star-shaped edible glitter or a small candy.
- Optional: Pipe small dots of frosting to resemble ornaments or baubles.
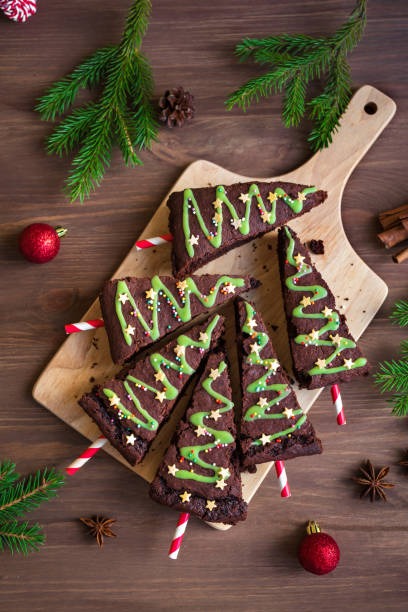
5. Final Touches
- For added wow factor, lightly dust with edible shimmer.
- Arrange small candies or candies canes around the base for a full holiday scene.
- Let the decorations set for about 10-15 minutes before serving.
Tips for Success
- Sturdy brownies: Ensure your brownies are firm enough to hold the shape after cutting. Slightly under-baking can help.
- Colorful decorations: Use vibrant frosting and candies for visual appeal.
- Piping precision: Practice piping on parchment before decorating your main trees.
- Uniform size: Use the same size cookie cutter for consistent shapes.
- Advance prep: Decorate just before serving to keep decorations fresh.
Common Mistakes and How to Avoid Them
| Mistake | Solution |
|---|---|
| Brownies crumbling when cutting | Let brownies cool completely; use a sharp knife; chill before cutting. |
| Decorations sliding off | Use firm frosting as a base; allow decorations to set before moving. |
| Overcrowding decorations | Less is more; avoid cluttering for a polished look. |
| Using overly soft brownies | Choose recipes with enough moisture but that are firm once cooled. |
Similar Variations You Can Try
Want to spice up your holiday baking? Here are some creative twists:
- Vegan versions: Use plant-based butter and egg substitutes.
- Different shapes: Use cookie cutters like stars or ornaments for variety.
- Themed colors: Incorporate red and gold accents for a luxe look.
- Layered trees: Make vertical brownie layers with frosting between.
- Chocolate-dipped trees: Dip the cut-out brownies in melted chocolate at the end for an extra indulgence.
Wrapping It Up
And there you have it—your complete guide to making adorable, festive Christmas Tree Brownies! Not only do they taste fantastic, but they also add a charming visual touch to any holiday celebration. Remember, it’s all about creativity, patience, and having fun in the kitchen. So, gather your ingredients, channel your inner pastry artist, and let your holiday spirit shine through these delightful treats.
Get ready to impress your friends and family with these festive brownies. Happy baking and happy holidays!