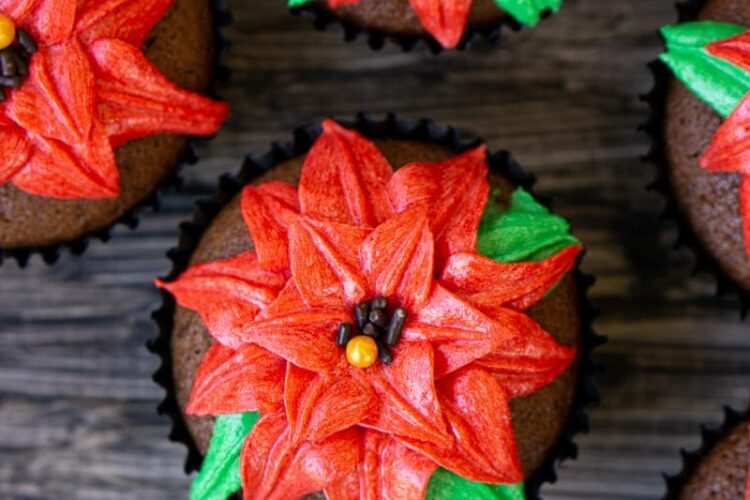
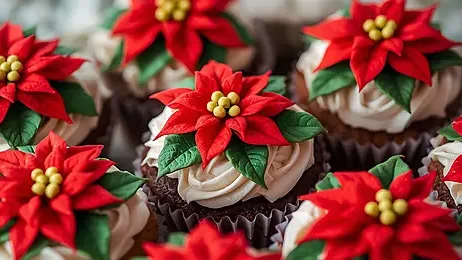
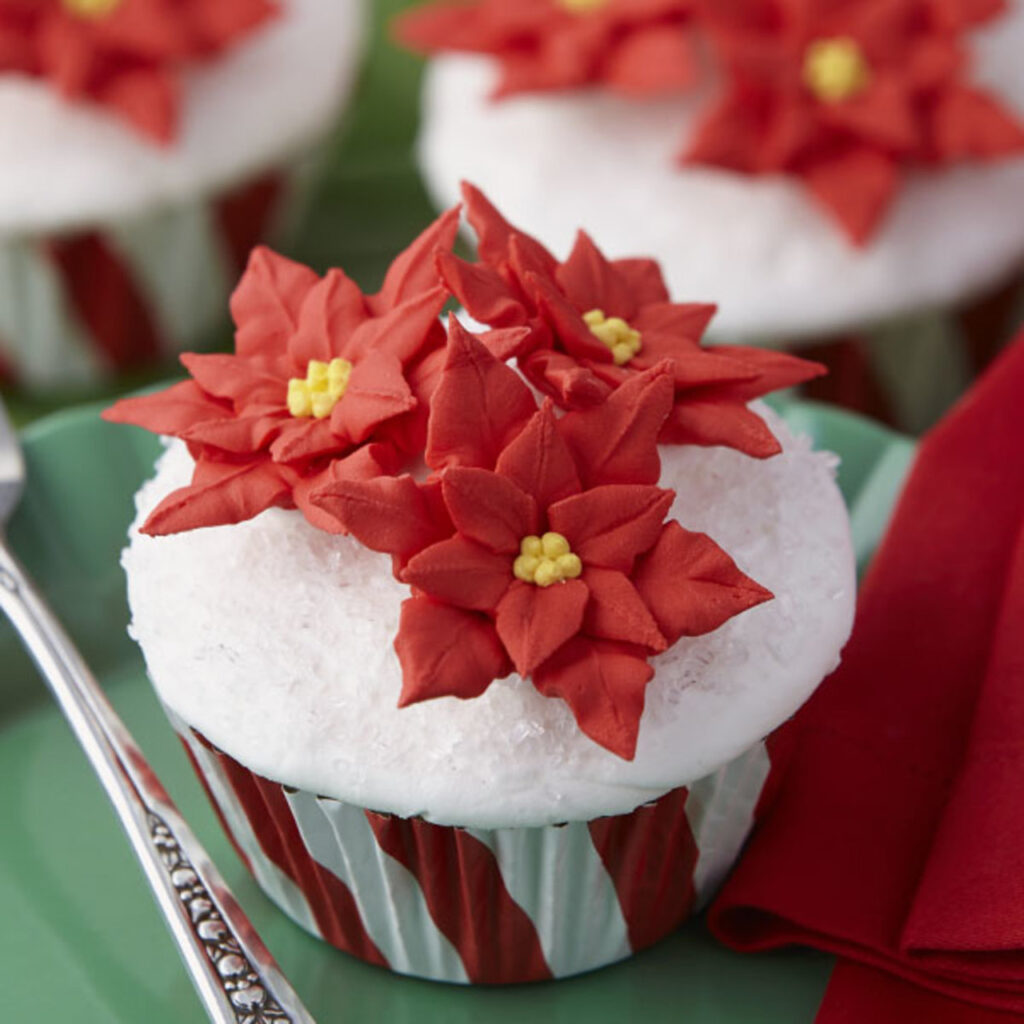
Hey friends! If you’re looking to bring some festive flair to your holiday baking, then you’ve come to the right place. Today, I’m excited to share my favorite recipe for Red Poinsettia Cupcakes—a show-stopping dessert that’s perfect for Christmas parties, family gatherings, or just adding some holiday cheer to your day. These cupcakes aren’t just pretty—they’re also surprisingly easy to make, and I’ll walk you through every step to ensure your poinsettias look truly stunning. Let’s dive into this colorful, delicious, holiday treat!
What Are Red Poinsettia Cupcakes?
Before we jump into the how-to, let’s talk about what makes these cupcakes special. Inspired by the iconic holiday flower—the poinsettia—these cupcakes mimic its beautiful red petals using frosting and edible decorations. They’re a festive bakery masterpiece that combines vibrant red icing with green accents, topped with tiny touches of white or yellow to resemble pollen or flower centers.
In simple terms:
Red Poinsettia Cupcakes are cupcakes decorated to resemble a poinsettia flower, making them a perfect Christmas centerpiece for your dessert table.
Key Features of Red Poinsettia Cupcakes
| Feature | Description |
|---|---|
| Visual appeal | Bright, eye-catching red petals with green foliage |
| Flavor profile | Usually vanilla or chocolate cupcake base with sweet frosting |
| Occasion | Christmas, holiday parties, winter gatherings |
| Customization | Can incorporate different colors and designs for variety |
Materials Needed: Everything to Make Perfect Poinsettia Cupcakes
Now, let’s look at the tools and ingredients you’ll need. Having the right materials assures a smooth baking process and beautiful results.
Ingredients
| Ingredient | Quantity | Notes |
|---|---|---|
| All-purpose flour | 2 ½ cups | For baking cupcakes |
| Granulated sugar | 1 ¾ cups | Sweetness and moisture |
| Unsalted butter | ¾ cup | Softened, for batter and frosting |
| Eggs | 3 large | For structure and richness |
| Vanilla extract | 1 tablespoon | For flavor |
| Baking powder | 1 ½ teaspoons | Leavening agent |
| Salt | ½ teaspoon | Enhances flavor |
| Whole milk | 1 cup | Moisture and tenderness |
For the Frosting
| Ingredient | Quantity | Notes |
|---|---|---|
| Unsalted butter | 1 cup | Softened |
| Powdered sugar | 3-4 cups | Sweetness and structure |
| Heavy cream | 2-4 tablespoons | For smooth frosting |
| Red gel food coloring | As needed | To color frosting |
| Green gel food coloring | For leaves | To decorate greenery |
| Edible yellow or white sprinkles | Optional | To mimic flower pollen |
Tools & Equipment
- Cupcake liners and baking tray: To bake the cupcakes
- Mixing bowls & hand/stand mixer: For batter and frosting
- Piping bags & decorating tips: For creating petals and leaves
- Small leaf piping tip (e.g., #67): To shape leaves
- Round piping tip (e.g., #12): For flower centers and pollen
- Food-safe scissors or craft knife: To shape tiny leaves or petals if needed
- Cooling rack: To cool cupcakes evenly
The Step-by-Step Process: From Batter to Gorgeous Poinsettia
Let’s get into the nitty-gritty of how to craft these holiday beauties.
Step 1: Prepare Your Cupcake Batter
- Preheat your oven to 350°F (175°C). Line your cupcake tray with festive liners.
- In a large mixing bowl, whisk together the flour, baking powder, and salt.
- In another bowl, beat the butter and sugar until light and fluffy, about 3-4 minutes.
- Add eggs one at a time, beating well after each addition.
- Mix in vanilla extract.
- Alternately add the flour mixture and milk, starting and ending with flour, mixing until just combined.
- Use a spatula to scrape down the sides and ensure even batter distribution.
Step 2: Bake the Cupcakes
- Fill cupcake liners about 2/3 full with batter.
- Bake for 18-20 minutes or until a toothpick inserted near the center comes out clean.
- Remove from oven and transfer cupcakes to a cooling rack to cool completely.
Step 3: Prepare the Red Frosting
- Beat softened butter until creamy.
- Gradually add powdered sugar, one cup at a time, mixing well.
- Add vanilla and enough heavy cream to reach your desired consistency.
- Mix in a few drops of red gel food coloring—start with small amounts and add until the shade is a vibrant red.
- Beat on high until fluffy and smooth.
Step 4: Decorate the Cupcakes
Now for the fun part! This is where your cupcakes become miniature poinsettia flowers.
Creating Petals:
- Fill a piping bag fitted with a petal or star tip with red frosting.
- Pipe elongated petals around the top of each cupcake, starting from the center and working outward in a radial fashion.
- For a more natural look, vary the size and angle of each petal.
Adding Green Foliage:
- Fill a piping bag fitted with a leaf tip.
- Pipe small leaves around the base of the petals to mimic poinsettia foliage.
- Use green food gel for coloring the frosting.
Adding Center Details:
- Use a round tip to pipe tiny yellow or white dots in the center of the flower to resemble pollen or the flower’s core.
- Alternatively, sprinkle edible pollen dust or yellow sugar beads.
Step 5: Final Touches
- Optional: Add small accents like glitter or edible pearls for extra holiday sparkle.
- Arrange the decorated cupcakes on a festive tray or stand.
Tips for Success
- Color Brightness: Use gel food coloring instead of liquid to achieve vibrant reds and greens without thinning the frosting.
- Petal Precision: Practice piping on parchment paper first. Consistency makes the petals look more realistic.
- Temperature Control: Keep frosting at the right consistency—if it’s too stiff, add a tiny bit of milk; if too soft, chill for a few minutes.
- Cupcake Size: Use standard-sized cupcake liners for proportionate petals and decorations.
- Taste & Texture: Consider adding a splash of lemon zest or vanilla to the frosting for extra flavor.
Common Mistakes & How to Avoid Them
| Mistake | Solution |
|---|---|
| Overfilling cupcake liners | Fill only 2/3 full for even baking and clean decorating |
| Frosting too soft | Chill frosting briefly before piping |
| Uneven petal placement | Practice piping technique on parchment paper beforehand |
| Using liquid food coloring | Opt for gel colors for vibrancy and to avoid altering frosting consistency |
| Skipping cooling time | Always cool cupcakes thoroughly before decorating to prevent smudging |
Variations to Spark Your Creativity
Looking to put your own spin on the red poinsettia? Here are some fun ideas:
| Variation | Description |
|---|---|
| White Poinsettia | Use white frosting with red accents for a winter snow theme |
| Pink Poinsettia | Swap out the red for pink hues for a softer look |
| Multi-tiered Flowers | Layer several small cupcakes with different petal arrangements for a more intricate design |
| Chocolate Base | Use chocolate cupcakes and complement with red and green frosting for a richer flavor |
| Sparkle Effects | Add edible glitter or shimmer dust for festive shimmer |
Wrapping It Up: Your Holiday Showstopper Awaits
There you have it—a detailed, step-by-step guide to creating beautiful Red Poinsettia Cupcakes that will wow your friends and family this holiday season. Remember, practice makes perfect, and don’t be afraid to get creative with colors and decorations. With a little patience and some festive spirit, you’ll be baking holiday masterpieces in no time!
Whether you’re a beginner or a seasoned baker, these cupcakes are sure to add that magical holiday touch to your festivities. So, gather your materials, follow these tips, and get ready to impress your guests with a tray of gorgeous poinsettia cupcakes. Happy baking, and may your holiday be filled with sweetness and joy!