Hey friends! With the holiday season just around the corner, I know many of us are eager to whip up some delightful treats that dazzle both the eyes and the taste buds. Today, I’m sharing a stunning recipe for Sparkling Snowflake Christmas Cookies—a perfect centerpiece for your holiday cookie platter or an adorable gift. But here’s the thing: while most recipes give you the basic steps, I want to take you beyond that. We’ll explore everything from crafting those intricate snowflake designs to tips that ensure your cookies come out perfectly every time. Ready? Let’s dive into the festive world of snowflake cookies!
What Are Sparkling Snowflake Christmas Cookies?
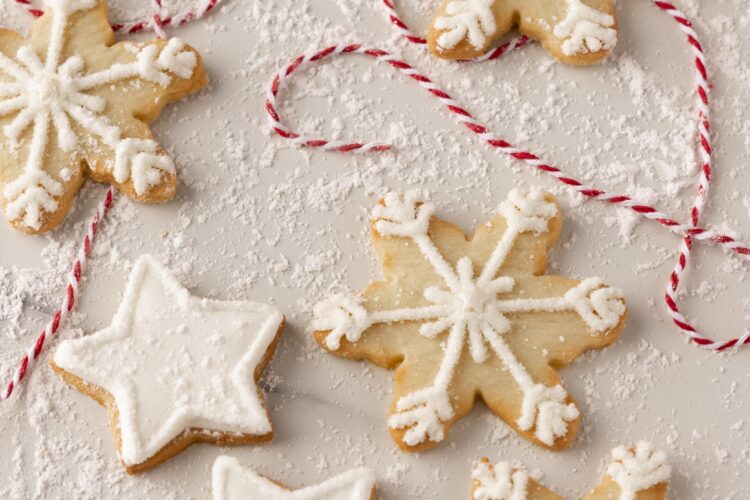
Before we get into the fun part—baking and decorating—let’s clarify what makes these cookies really special. Sparkling snowflake cookies are sugar cookies shaped like delicate snowflakes, decorated with shimmering icing and edible glitter to mimic the frost-kissed beauty of winter. They’re not just treats; they’re edible holiday ornaments that bring spirit and sparkle to your festivities.
Key Elements of Sparkling Snowflake Cookies:
Definition List
- Sugar Cookies: Soft, buttery cookies that hold their shape when baked and are perfect for detailed decorating.
- Royal Icing: A smooth, hard-drying icing made from powdered sugar and egg whites or meringue powder, ideal for detailed piping and decorating.
- Edible Glitter & Luster Dust: Food-safe shimmer powders that add sparkle and mimic icy frost.
- Snowflake Shapes: Intricate cookie cutters or freehand piping techniques to create detailed snowflake designs.
- Baking Techniques: Methods that ensure cookies are perfectly baked with a tender crumb and defined patterns.
Materials Needed
Having the right materials is key to creating beautiful sparkling snowflake cookies. Below is a detailed table to guide your shopping list:
| Material | Details & Alternatives | Quantity / Size |
|---|---|---|
| Cookie Cutter | Snowflake-shaped cutter; optional: various sizes for layered designs | 1-2 sets |
| Mixing Bowls | Stainless steel or glass | 2-3 |
| Rolling Pin | Adjustable or standard | 1 |
| Parchment Paper | For rolling and baking | Sufficient size for sheets |
| Silicone Baking Mat | Non-stick surface, optional | 1 |
| Electric Mixer | Hand or stand mixer | 1 |
| Piping Bags | Disposable or reusable | 3-4 |
| Piping Tips | Fine tips (size 0 or 00), small star tip or round tip | Various |
| Edible Glitter & Luster Dust | Food-grade shimmer powders | Assorted colors |
| Food Coloring | Gel or liquid, primarily white and metallic shades | Several |
| Toothpicks or Fine-Tip Brushes | For detailed decorating | 1-2 of each |
| Cooling Racks | To cool the cookies | 1 |
Ingredients List
For the cookie dough:
| Ingredient | Details & Alternatives | Quantity |
|---|---|---|
| Unsalted Butter | Cold, softened | 1 cup (226g) |
| Granulated Sugar | Fine for smooth dough | 1 cup (200g) |
| Eggs | Large | 1 large |
| Vanilla Extract | Pure vanilla preferred | 1 tsp |
| All-purpose Flour | Sifted | 3 ½ cups (440g) |
| Baking Powder | For slight expansion | 1 tsp |
| Salt | Fine sea salt | ½ tsp |
For decoration:
| Ingredient | Details | Quantity |
|---|---|---|
| Royal Icing | Made from powdered sugar, egg whites or meringue powder | As needed |
| Edible Glitter & Luster Dust | To add shimmer and frost effect | As desired |
| Food Coloring Gels | To tint royal icing and decorations | Various colors |

The Step-by-Step Guide to Baking Sparkling Snowflake Cookies
Ready to make magic happen? Let’s go through the process step by step. I’ll include tips at each stage to help you avoid common pitfalls and ensure your cookies turn out perfect.
Step 1: Preparing the Cookie Dough
Cream Butter and Sugar: In your mixing bowl, beat the softened butter and sugar on medium speed until light and fluffy (about 2-3 minutes).
Add Eggs and Vanilla: Mix in the egg and vanilla extract until fully incorporated.
Combine Dry Ingredients: In a separate bowl, whisk together flour, baking powder, and salt.
Mix Dry and Wet: Gradually add dry ingredients to the wet mixture on low speed. Mix just until combined; do not overmix, or dough may become tough.
Chill the Dough: Form into a flat disc, wrap in plastic wrap, and refrigerate for at least 1 hour. Chilling firms up the dough and makes it easier to roll out.
Tip: For cleaner cuts, chill at least 2 hours or overnight.
Step 2: Cutting and Baking
Preheat Oven: Set to 350°F (175°C). Line baking sheets with parchment paper or silicone mats.
Roll Out Dough: Lightly flour your work surface and rolling pin. Roll dough to about ¼-inch thickness.
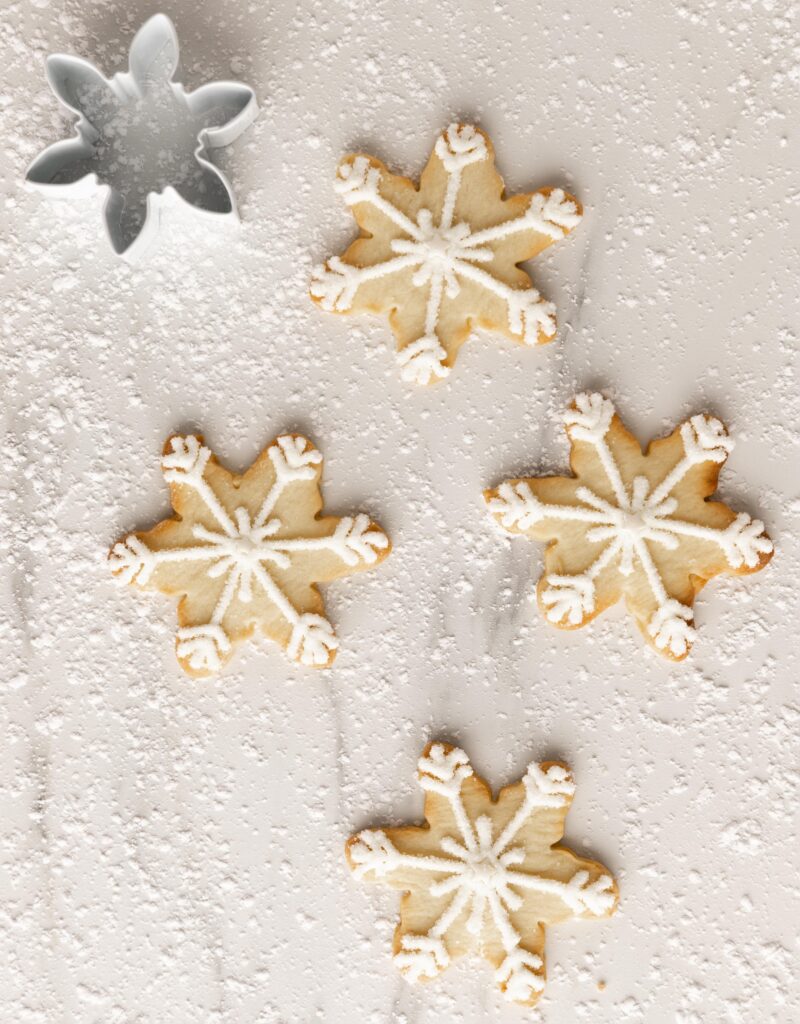
Cut Snowflakes: Use your snowflake cutter to stamp out shapes. To make complex designs, you can also create layered or nested cookies.
Transfer to Baking Sheet: Carefully place cutouts on prepared sheets, spacing them about 1-2 inches apart.
Bake: Bake for 8-10 minutes, or until edges are lightly golden.
Cool Completely: Transfer to cooling racks; cool thoroughly before decorating to prevent smudging.
Common Mistake: Overbaking can cause cookies to crack or lose detail. Keep a close eye on the timer.
Step 3: Making and Applying Royal Icing
Prepare Royal Icing: Beat powdered sugar, egg whites (or meringue powder), and a teaspoon of lemon juice until glossy and firm peaks form. If too thick, thin with a few drops of water.
Color the Icing: Divide and tint with food coloring gels.
Fill Piping Bags: Fit with small round or star tips, depending on your design.
Decorate:
- Pipe intricate snowflake patterns.
- Use toothpicks or fine brushes for delicate details.
- Add edible glitter or luster dust for that sparkling effect.
Tip: Practice piping on parchment paper first to perfect your design.
Step 4: Adding Sparkle and Finishing Touches
Apply Glitter: Immediately sprinkle edible glitter or dust onto wet royal icing or onto cookies with slightly damp icing.
Let Set: Allow decorated cookies to dry and set for at least 4 hours, preferably overnight, before stacking or packaging.
Tips for Success
- Use high-quality ingredients: They make a noticeable difference, especially edible glitter and food colors.
- Chill your dough: It keeps your shapes sharp.
- Work quickly when decorating: Royal icing dries fast, so have your tools ready.
- Layer your decorating: Start with base colors, then add details.
- Experiment with shimmer: Mix different edible glitter shades to create a frosty, icy look.
Common Mistakes and How to Avoid Them
| Mistake | Solution |
|---|---|
| Cookies spread too much | Chill the dough thoroughly and avoid overworking it. Use a sharp cutter. |
| Royal icing is too runny | Adjust consistency with powdered sugar or a little meringue powder. |
| Decorations smudge or lose detail | Decorate after cookies are fully cooled and dry. Use appropriate piping tips. |
| Glitter falls off | Apply glitter while icing is still tacky, or very lightly dampen the surface before sprinkling. |
Variations and Creative Ideas
- Colored Snowflakes: Incorporate autumn or winter hues such as icy blue, silver, white, or even pastel shades for a softer look.
- Flavored Cookies: Add a splash of peppermint or almond extract to dough for extra festive flavor.
- Layered Decorations: Use different piping tips to layer patterns for extra dimension.
- Alternative Shapes: Create snowflakes in different sizes or snow-themed cookies like snowmen and icicles.
- Glitter Alternatives: Use colored sanding sugar or shimmer sprays for a different sparkly effect.
Summary & Action Points
There you have it! Making sparkling snowflake Christmas cookies isn’t just about baking—it’s about creating edible art that adds a touch of magic to your holiday celebrations. From selecting high-quality ingredients to meticulously decorating with glitter and icing, every step counts towards that picture-perfect, Christmas-y sparkle.
So gather your materials, get creative, and don’t be afraid to experiment. These cookies will surely impress your family and friends and bring a shimmer of winter wonder to your home. Happy baking, and may your holiday season be filled with sweet, sparkling moments!
If you want more holiday baking inspiration, stay tuned! And remember: with patience and a little practice, your snowflake cookies will become your favorite festive treat.