Hey there! Planning to impress your family and friends with a colorful, tasty holiday treat? If so, คุณ’re in the right place. Today, I’ll walk you through everything you need to make delicious, eye-catching holiday pinwheel cookies. These cookies are not just fun to look at but are also surprisingly simple to make once you get the hang of it. Ready to turn your baking game up a notch? Let’s dive into the ultimate guide for making holiday pinwheel cookies!
What Are Holiday Pinwheel Cookies?
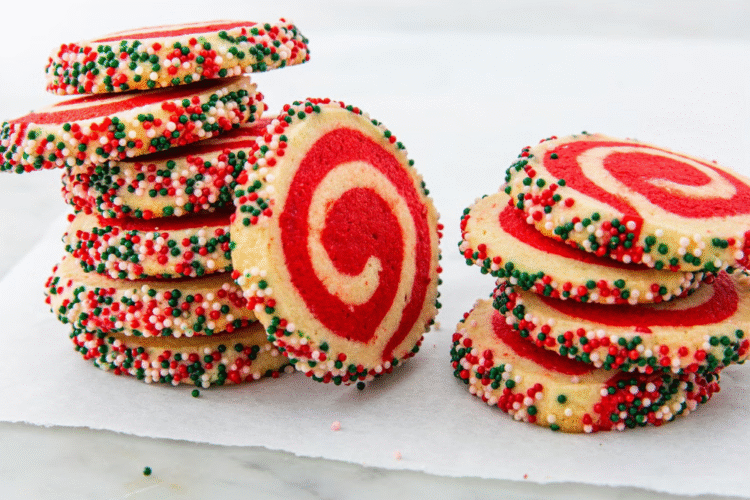
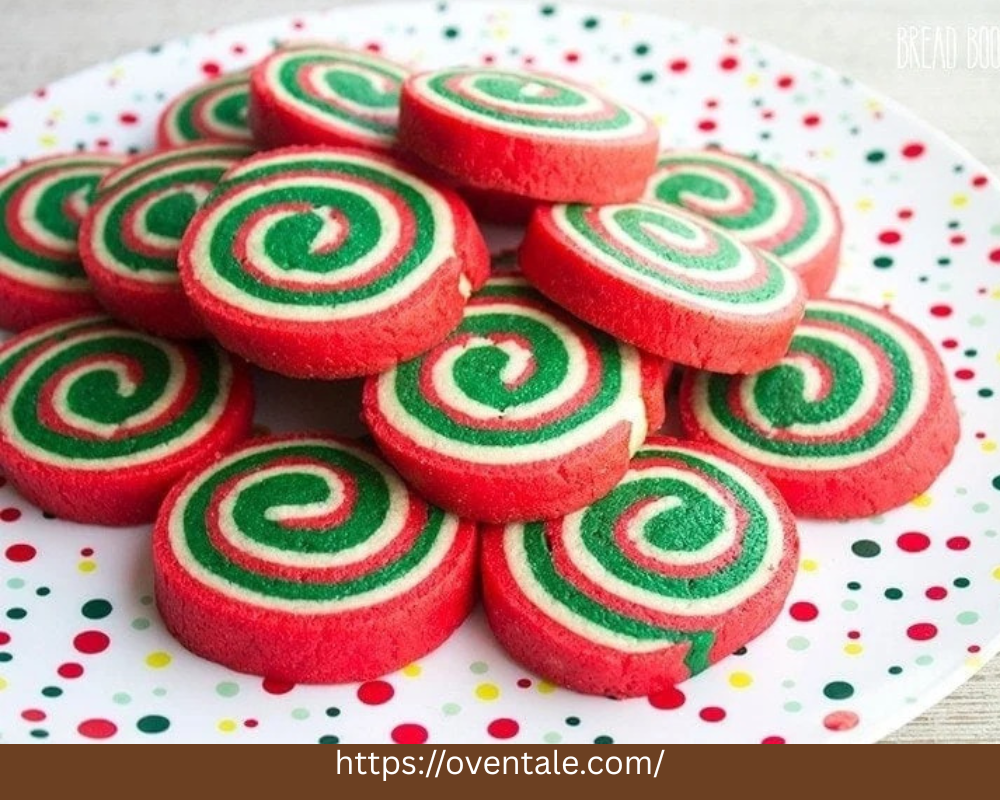
Imagine a cookie with a stunning swirl pattern, bright layers of colors, and a delightful flavor. That’s exactly what a pinwheel cookie is—a beautifully rolled, sliced treat that displays a mesmerizing spiral pattern. Traditionally enjoyed during festive seasons, these cookies are perfect for holiday parties, gift baskets, or just satisfying your sweet tooth with some eye candy.
Definition List:
- Pinwheel Cookies: Cookies made by rolling colored dough into a log, slicing it into rounds, and baking until the swirl pattern is visible.
- Swirl Pattern: The spiral design created by layering different colored doughs before rolling.
- Festive Variations: Incorporating holiday-themed colors (e.g., red and green for Christmas, red, white, and blue for patriotic celebrations).
Why Are These Cookies a Holiday Favorite?
Aside from their gorgeous looks, pinwheel cookies are loved for their versatility and flavor. They can be customized with various flavors like vanilla, chocolate, or mint, and decorated with sprinkles, icing, or edible glitter to suit any celebration.
Key Benefits:
- Bright, festive appearance
- Customizable flavors and colors
- Easy to make in batches
- Great for gifting and sharing
Materials Needed — Essential Supplies & Ingredients
Let’s get organized—here’s a detailed list of what you’ll need to craft these holiday treats.
Materials Needed Table
| Item | Quantity/Size | Notes |
|---|---|---|
| Unsalted butter | 1 cup (2 sticks) | Softened at room temperature |
| Granulated sugar | 1 cup | Fine for smooth dough |
| Egg | 1 large | Fresh |
| Pure vanilla extract | 1 teaspoon | For flavor |
| All-purpose flour | 3 cups | Sifted |
| Baking powder | 1 teaspoon | For slight lift |
| Salt | 1/4 teaspoon | Enhances flavor |
| Food coloring (red, green, etc.) | As needed for layers | Gel food coloring preferred |
| Optional: Cocoa powder | 2-3 tablespoons | For chocolate swirl variations |
| Parchment paper | Several sheets | For rolling and baking |
| Rolling pin | 1 | Evenly roll dough |
| Plastic wrap | Several pieces | Wrap dough during chilling |
| Baking sheets | 2-3 | For baking cookies |
| Cooling rack | 1 | Cool cookies after baking |
Step-by-Step Guide to Making Holiday Pinwheel Cookies
Now, let’s walk through the process, step by step. I’ll break it down into easy-to-follow directions so even beginners can get perfect results.
Preparation Tips:
- Chill dough before rolling for easier handling.
- Use gel food coloring for vibrant, lasting colors.
- Measure ingredients precisely for optimal texture.
Step 1: Make the Basic Dough
- In a large bowl, cream the softened butter and sugar until smooth and fluffy.
- Beat in the egg and vanilla extract until combined.
- In a separate bowl, whisk together the flour, baking powder, and salt.
- Gradually add dry ingredients to the wet mixture, mixing until a soft dough forms.
- Divide the dough into three equal portions if making multicolored layers.
Step 2: Color the Dough
- Take one portion of dough and add green food coloring.
- Mix until uniformly colored.
- Repeat with the other portions, coloring one red and leaving one plain or adding cocoa powder for a chocolate layer.
Step 3: Chill the Dough
- Wrap each colored dough portion tightly in plastic wrap.
- Chill for at least 2 hours. This makes it easier to roll and helps maintain distinct colors.
Step 4: Roll & Layer the Dough
- Lightly flour your work surface and rolling pin.
- Roll each dough portion into a rectangle (about 8×10 inches).
- Place the colored layers on top of each other, stacking carefully.
- Roll the layered dough into a tight log, starting from one short end, to form a swirl.
- Wrap the log in plastic and chill for another hour.
Step 5: Slice & Bake
- Preheat your oven to 350°F (175°C). Line baking sheets with parchment paper.
- Slice the chilled log into 1/4-inch thick rounds.
- Place slices on baking sheets about 1 inch apart.
- Bake for 10-12 minutes, until edges are lightly golden.
- Let cookies cool on a wire rack before decorating.
Tips for Success
- Chill thoroughly: Cold dough holds its shape and prevents spreading.
- Use gel food coloring: It produces vibrant colors that won’t thin your dough.
- Keep the work surface floured: Prevent sticking during rolling.
- Press lightly when slicing: For even, neat cookies.
Common Mistakes & How to Avoid Them
| Mistake | How to Fix / Prevent |
|---|---|
| Dough sticking during rolling | Use enough flour on the surface and rolling pin |
| Colors bleeding during baking | Chill layered dough thoroughly; avoid overworking dough |
| Cookies spreading and losing swirl pattern | Keep dough cold, and don’t flatten cookies before baking |
| Under or over-baking | Keep an eye on baking time; cookies should be golden around edges |
Variations & Creative Ideas
- Holiday Colors: Use red and green or blue and white for Christmas.
- Flavor Twists: Add cocoa powder, peppermint extract, or lemon zest.
- Decorations: Drizzle with icing, sprinkle powdered sugar, or add holiday sprinkles.
- Gluten-Free Version: Substitute gluten-free flour blends.
Summary & Final Thoughts
Holiday pinwheel cookies are a fantastic way to add color and joy to any celebration. With a little prep and patience, you’ll create stunning, delicious cookies that will wow family and friends alike. Remember to prepare all your materials beforehand, follow the steps carefully, and don’t rush the chilling process. The result? Beautiful, layered cookies with a perfect swirl—and a festive touch to your holiday table.
Now, grab your ingredients and get mixing! These cookies are not just tasty—they’re also a fun centerpiece for your holiday celebrations. Happy baking!
Feel inspired to experiment with different colors, flavors, and decorations. Your holiday cookie platter just got a whole lot more festive!