Ever wondered how to make adorable, melt-proof snowman cookies that not only look charming but are also fun to bake? If you’re looking for a festive holiday project or a sweet winter treat, this comprehensive guide is just what you need. I’ll walk you through everything—from materials to tips for success—so you can create picture-perfect melting snowman cookies that will wow your family and friends.
What Are Melting Snowman Cookies?
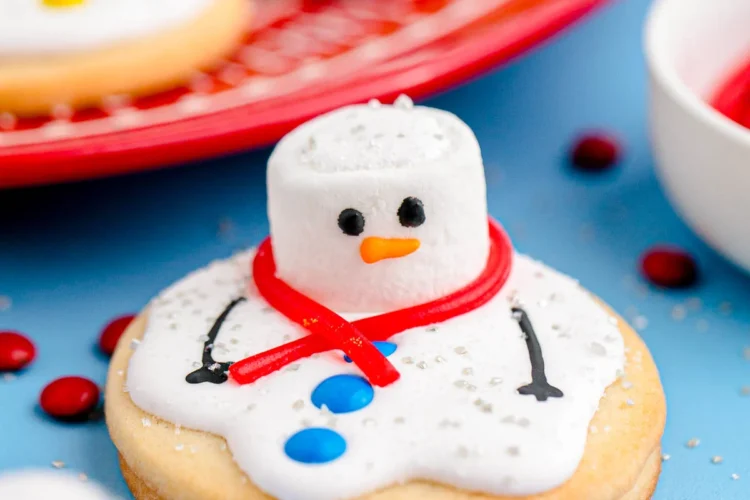
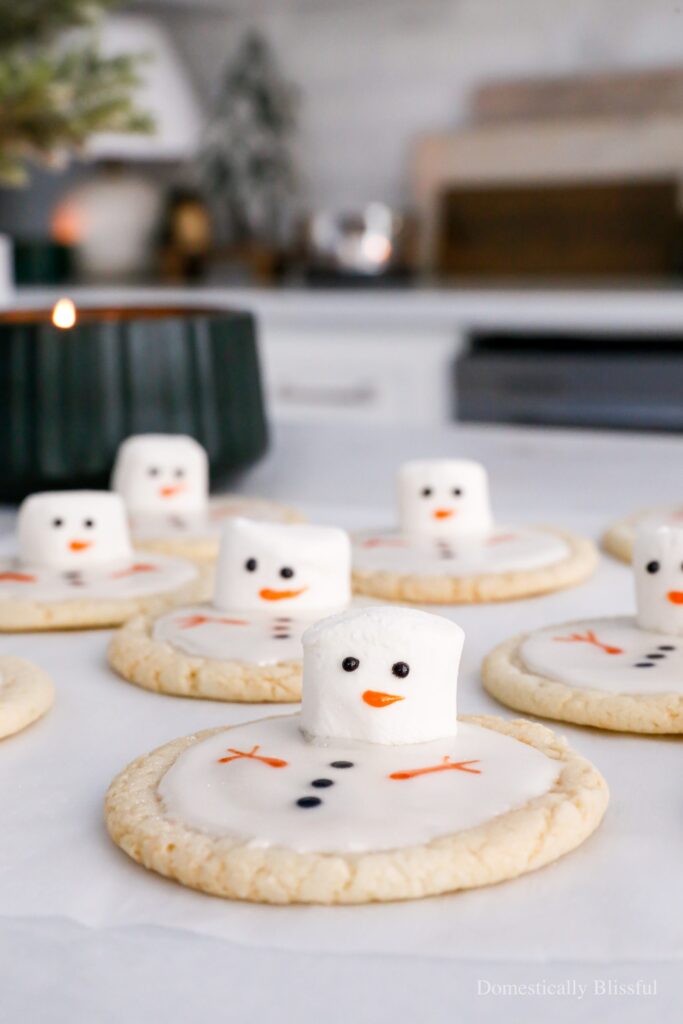
In essence, melting snowman cookies are adorable holiday treats designed to resemble snowmen that appear to be melting—adding a fun, whimsical touch to your baked goods. These cookies are typically made from sugar cookie dough or biscuit dough, decorated with royal icing or frosting, and styled with candies or edible decor.
Key Characteristics:
- Appearance: Snowmen with melted or drippy features.
- Theme: Festive, wintery, and playful.
- Occasions: Christmas parties, winter get-togethers, or just snowy day fun.
Now, let’s dive into what makes these cookies a must-try and how to craft them perfectly.
Materials Needed to Create Melting Snowman Cookies
Before you start baking, gathering all your materials is crucial for a smooth process. Here’s a comprehensive list in a neat table for easy reference.
| Materials | Details |
|---|---|
| Cookie Dough | Sugar cookie dough or your preferred cookie base |
| Rolling Pin | For rolling the dough evenly |
| Cookie Cutters | Snowman shape and small accessories (like buttons, scarves) |
| Baking Sheets | Flat, preferably non-stick or lined with parchment paper |
| Parchment Paper | Prevents sticking during baking |
| Cooling Racks | To cool cookies after baking |
| Royal Icing or Frosting | For decorating; can be homemade or store-bought |
| Food Coloring | To add color to icing (white, black, orange, and any festive shades) |
| Candy & Edible Decorations | Mini chocolate chips, small candies, edible sprinkles |
| Piping Bags & Tips | For detailed decorating |
| Edible Marker | Optional, for fine details |
Step-by-Step Guide: Crafting Your Melting Snowman Cookies
1. Prepare Your Cookie Dough
Start with a reliable sugar cookie dough that holds its shape well. You can make your own or buy pre-made dough—either works. Chill the dough for at least an hour to make rolling easier and cookies more shapely.
2. Roll and Cut Your Cookies
- Flour your surface to prevent sticking.
- Roll the dough evenly to about 1/4-inch thickness.
- Use snowman-shaped cookie cutters to cut out your cookies.
- Transfer cookies to prepared baking sheets lined with parchment paper.
3. Bake and Cool
- Bake cookies at 350°F (175°C) for 8-10 minutes or until the edges are just beginning to brown.
- Remove from oven and cool on a wire rack to prevent sogginess.
4. Decorate the Snowmen
Now for the fun part! Once cooled, start decorating.
- Outlined and flooded the snowman’s body with white royal icing.
- Use piping bags for details like eyes, mouth, buttons, and nose.
- Add accessories like scarves, hats, and other seasonal details.
5. Create the Melting or Dripping Effect
To simulate melting snow:
- Use slightly runny white icing or frosting.
- Let it drip down one side of the snowman, creating a melting appearance.
- Use a piping bag or a spoon to guide the ‘drips’ downward.
- Add extra detail with edible markers or small candies.
6. Final Touches
- Add small candies for buttons.
- Use black icing or edible markers for eyes and mouth.
- Add final accents like glitter or sprinkles for a festive touch.
7. Allow to Set
- Let your decorated cookies sit at room temperature until the icing hardens, about 2 hours.
- For faster drying, place them in a cool, dry place or refrigerate briefly.
Tips for Success
- Use Quality Ingredients: Good royal icing and candies make all the difference.
- Practice Piping: Practice your piping techniques on parchment paper before decorating.
- Temperature Control: Keep icing at the right consistency—thick enough to hold shape but flowy enough to ‘melt’.
- Decorate in Layers: Allow each layer of icing to dry before adding more details.
- Be Patient: The melting effect looks best when the icing is slightly runny but not too watery.
Common Mistakes & How to Avoid Them
| Mistake | Solution |
|---|---|
| Icing too thick for drips | Thin your icing with a few drops of water until it flows easily. |
| Overcrowding decorations | Finish decorating one cookie at a time to prevent smudging. |
| Rushing the drying process | Allow ample drying time to prevent smudges or melting details. |
| Not chilling dough before baking | Chill dough at least 1 hour to retain shape during baking. |
| Using low-quality candies or icing | Choose high-quality edible decorations for a professional look. |
Variations to Make Your Snowman Cookies Unique
- Seasonal Themes: Add Santa hats, scarves, or winter accessories.
- Colorful Drips: Use flavored or tinted icing to add color to the melting effect.
- Different Shapes: Experiment with other winter shapes like snowflakes, mittens, or reindeer.
- Flavor Infused Cookies: Incorporate vanilla, cinnamon, or peppermint flavors into dough or icing.

Summary & Final Action Point
Creating melting snowman cookies is a delightful holiday activity that allows for creativity, fun, and festive cheer. The secret is in your decorating techniques—particularly getting the icing consistency right for that adorable melting effect. Remember, preparation is key—gather all your materials beforehand, and give yourself plenty of time for decorating and drying.
So, gather your ingredients and decorations, follow these detailed steps, and enjoy making charming melting snowman cookies that will steal the show at any winter celebration!
Wrap Up
I hope this guide has inspired you to bring some winter magic into your kitchen. Whether you’re baking for family or friends, or just craving a festive treat, these melting snowman cookies are sure to delight. Happy baking, and don’t forget—sometimes, the messiest cookies turn out to be the most memorable!