
Hey there, cookie lovers! Ever wondered how to create a holiday treat that’s as festive as it is adorable? Today, I’m going to walk you through making Pilgrim Hat Cookies — a fun, festive treat perfect for Thanksgiving gatherings, classroom parties, or any fall celebration. If you’ve seen these charming confections before and thought, “How do they do that?” you’re in the right place. I’ll share all the tips, tricks, and secrets to making beautiful, delicious pilgrim hat cookies that will impress everyone!
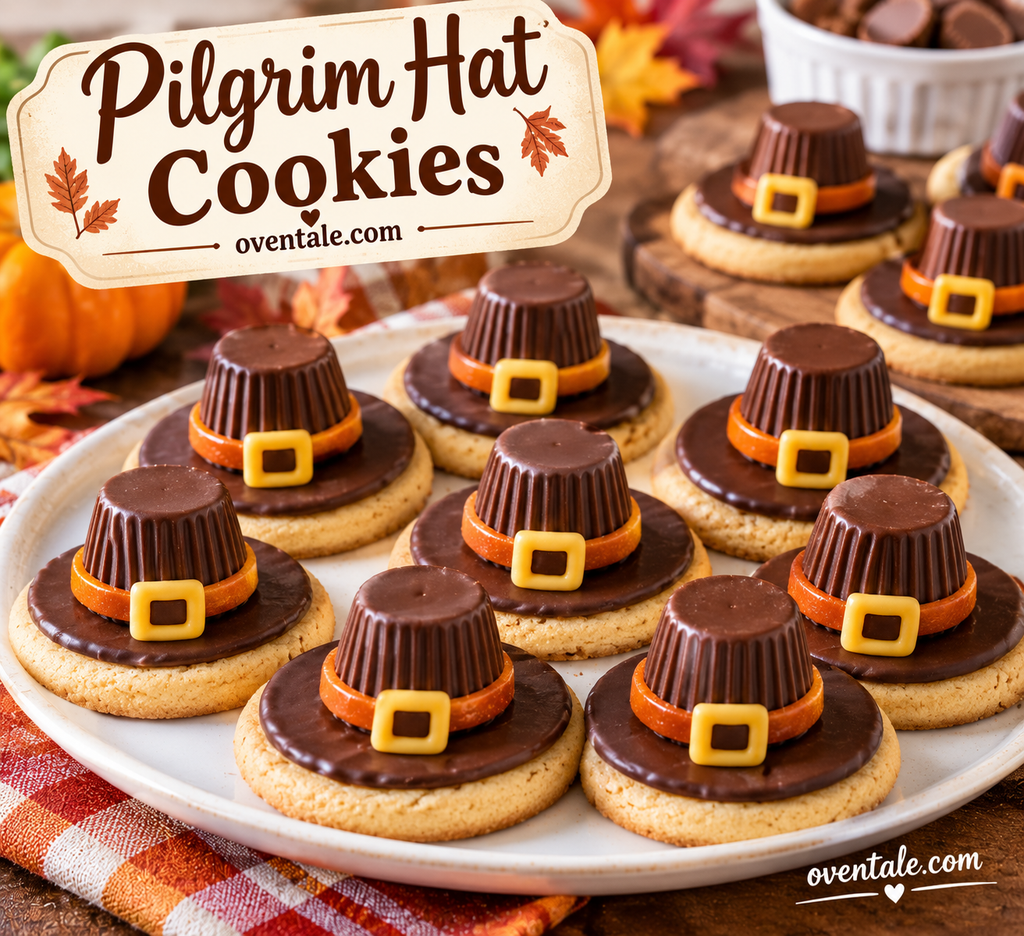
What Are Pilgrim Hat Cookies?
Pilgrim Hat Cookies are delightful, festive treats that resemble tiny pilgrim hats, typically made from basic ingredients like cookies, chocolate, and candies. These cookies are often decorated to mimic the classic Pilgrim attire, making your holiday table stand out. They’re easy to customize, fun to make with kids, and perfect for adding a creative touch to your dessert lineup.
Brief Overview:
- Type: No-bake or baked cookies with decorative frosting and candies
- Main ingredients: Cookies, chocolate, candies, frosting
- Occasion: Thanksgiving, fall festivals, cultural celebrations
Materials Needed: Everything You Need to Create Perfect Pilgrim Hat Cookies
Before diving into the steps, let’s make sure you have all the ingredients and tools ready for success.
| Material | Quantity/Specifications | Purpose |
|---|---|---|
| Graham crackers or sugar cookies | 12-15 pieces | Base of the hat |
| Chocolate candies (like Rolos or Snickers bites) | 12-15 pieces | Hat top, the brim |
| Black frosting or icing | 1 cup (prepared piping or decorating icing) | To create the hat band and brim detail |
| White frosting or icing | 1 cup (prepared piping or decorating icing) | Decorate the hat, optional brim edge |
| Decorative candies (optional) | Small candy pearls, Jimmies, or sprinkles | Additional decoration |
| Chocolate chips or melting chocolate | 1 cup | To attach candies and create the hat’s shape |
| Toothpicks or piping bags | As needed | For detailed decorating |
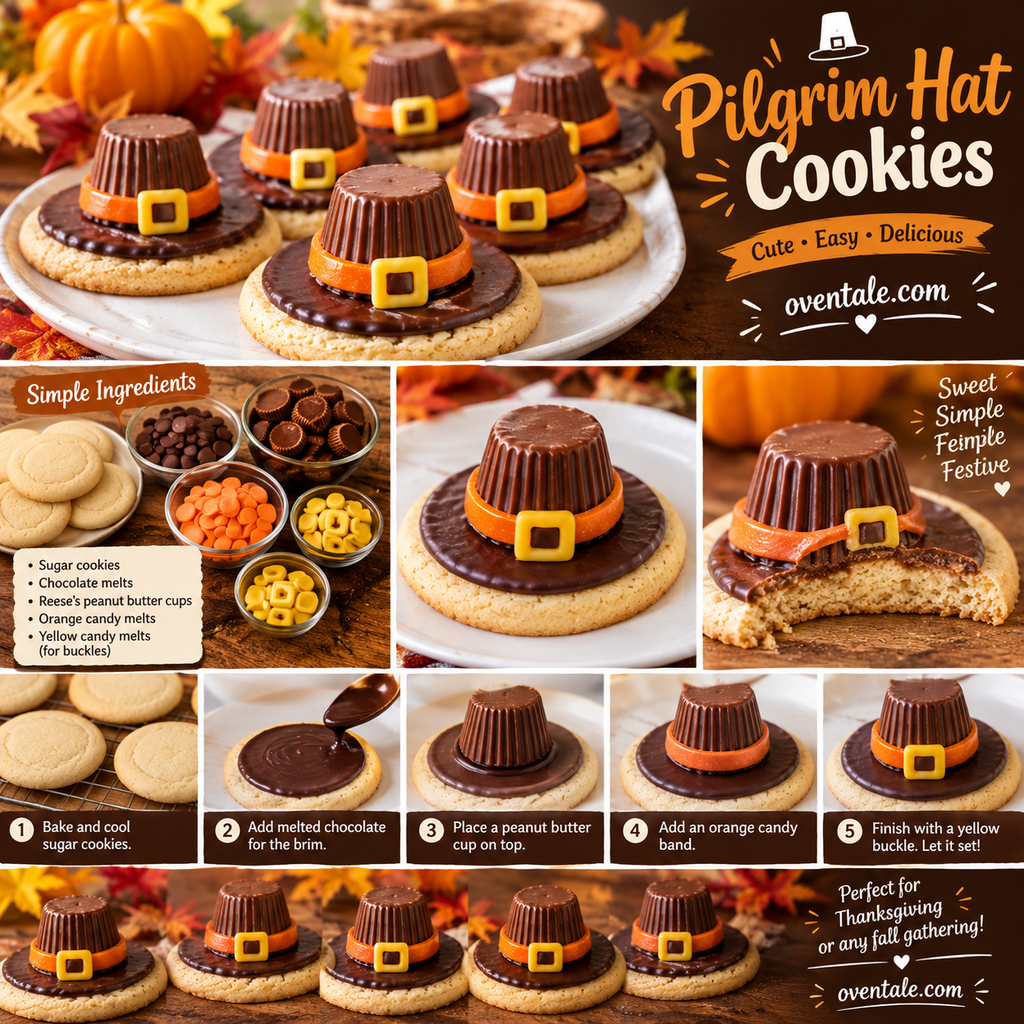
Tip: Use high-quality ingredients for the best taste and appearance. You want your cookies to look as great as they taste!
Step-by-Step Guide to Making Pilgrim Hat Cookies
Getting these cookies just right takes a little patience, but I promise it’s worth it. Let’s walk through the process from start to finish.
1. Prepare Your Workspace
- Clear your countertop.
- Lay out all ingredients and tools.
- Have a piping bag or plastic sandwich bag ready with a corner cut for decorating.
2. Prepare the Base
- Option 1: Use round graham crackers or sugar cookies as the hat’s base.
- Option 2: If you prefer a sturdier base, you can bake your own cookies and cut them into small circles.
3. Attach the “Hat Top”
- Place a chocolate candy (like a Rolo or mini Snickers) upside down on top of each cookie. This forms the top of the pilgrim hat.
- Use a small dab of melted chocolate or frosting to help secure it if needed.
4. Create the Hat Band
- Fill a piping bag with black frosting.
- Pipe a neat band around the base of the candy to mimic the hat’s band.
- Make sure to press gently to avoid tearing the cookie.
5. Add Decorative Details
- Use white frosting to pipe a thin line along the top or add a decorative edge.
- You can also add small candies or sprinkles for extra embellishment.
6. Final Touches
- Let everything sit for about 10 minutes so the frosting firms up.
- If you want a more polished look, add additional details like tiny dots or lines with contrasting icing.
Tips for Success in Making Pilgrim Hat Cookies
- Use firm cookies: Soft cookies may bend or break when attaching candies.
- Keep frosting at the right consistency: It should be thick enough to hold shapes but not so stiff that it’s hard to pipe.
- Chill your candies: If candies stick, refrigerate them briefly before use.
- Practice piping: If you’re new to decorating, practice on a piece of parchment first.
- Work quickly: Melted chocolate and frosting can set fast, so have everything ready beforehand.
Common Mistakes and How to Avoid Them
| Mistake | Solution |
|---|---|
| Candy falling off or slipping | Use a dab of melted chocolate or thick frosting to secure candies firmly |
| Cookie breaking | Use sturdy cookies; avoid overly soft or crumbly bases |
| Uneven piping | Practice piping technique; keep your icing at correct consistency |
| Decorations looking sloppy | Take your time and allow each layer to set before adding the next |
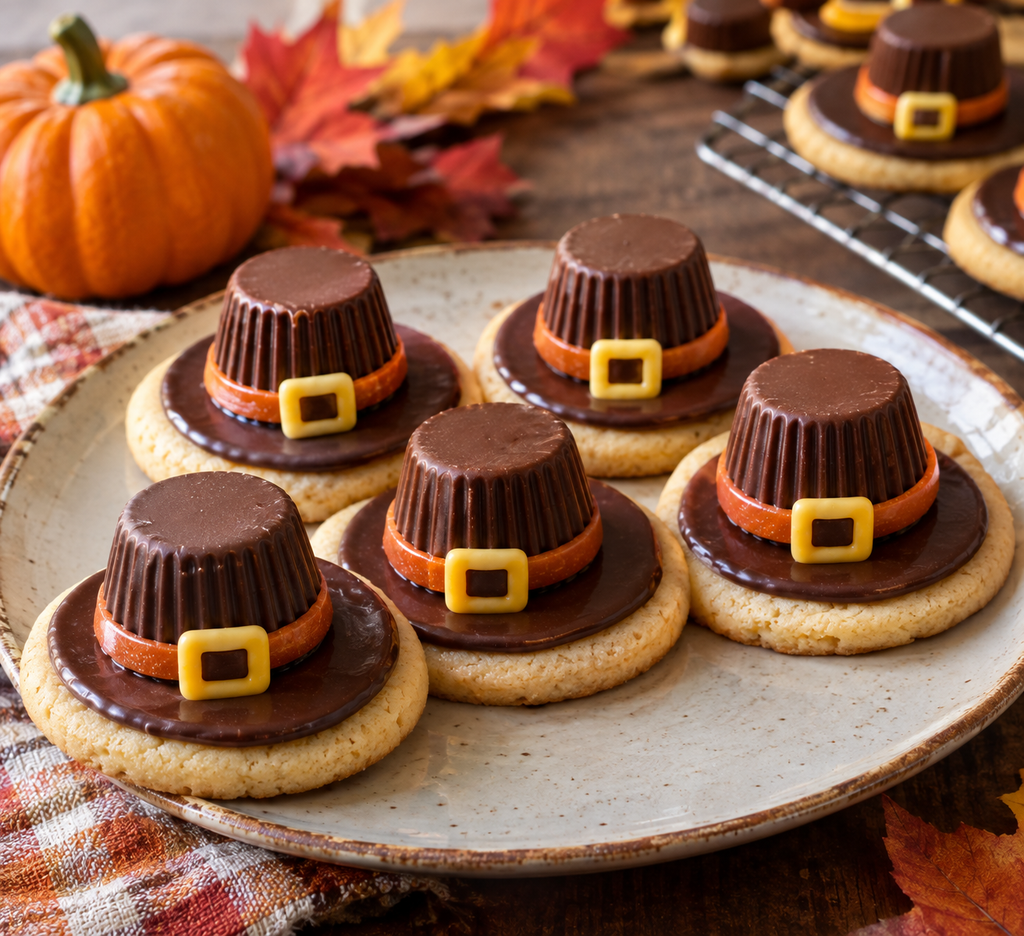
Variations You Can Try
Who says you have to stick to tradition? Here are some creative twists to customize your pilgrim hat cookies:
- Add fall-themed decorations: Use mini leaves, acorns, or pumpkins made from fondant.
- Use different candies: Try Reese’s Peanut Butter Cups or mini donuts for the hat top.
- Create mini pilgrim figures: Add tiny piped faces or hats for a cute display.
- Make gluten-free or vegan versions: Choose appropriate cookies and candies for dietary needs.
Summary: Your Path to Perfect Pilgrim Hat Cookies
And that’s it! Making pilgrim hat cookies isn’t just fun — it’s a fantastic way to bring a creative flair to your Thanksgiving table. With basic ingredients, a little patience, and some decorating flair, you can produce charming, tasty treats that everyone will love.
So, go ahead and gather your materials, follow these clear steps, and prepare to wow your family and friends with your festive baking skills. Whether you’re hosting a holiday party or simply want to add some fun to your dessert platter, these cookies are sure to be a hit!
Happy baking, friends! Remember, the key to success is enjoying the process — and savoring every delicious, adorable bite.