Hey friends! Today, I’m super excited to share a fun, festive, and adorable cupcake idea that’s perfect for the holiday season—Santa stuck in the chimney cupcakes! These delightful treats are not just a hit with kids but also bring a sprinkle of holiday cheer to every gathering. Whether you’re hosting a Christmas party, baking with your family, or looking for an easy Christmas baking project, these cupcakes are sure to wow everyone.
In this comprehensive guide, I’ll walk you through everything you need to know—from gathering ingredients to decorating tips—so you can create picture-perfect Santa chimney cupcakes that will steal the show. Ready? Let’s dive into this holiday baking adventure!
What Are Santa Stuck in the Chimney Cupcakes?
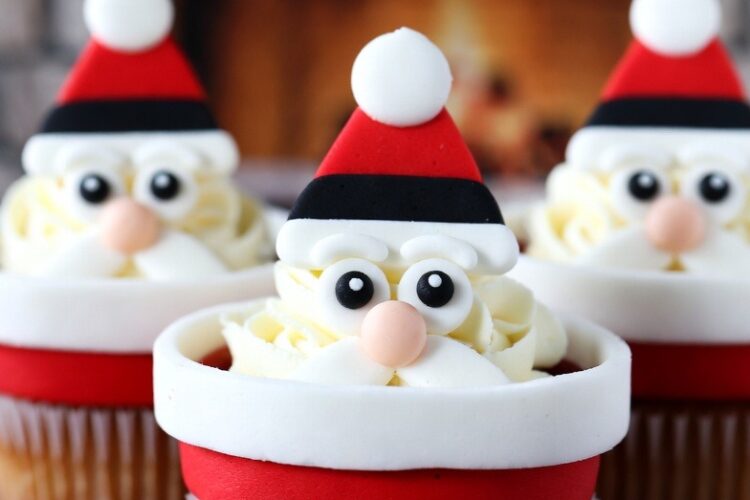
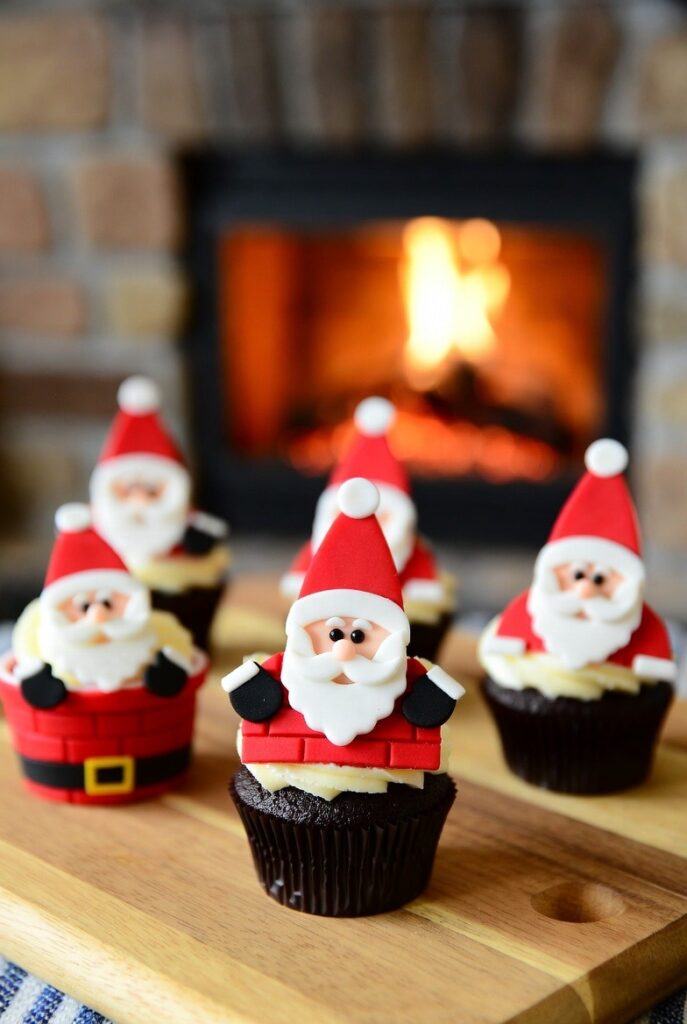
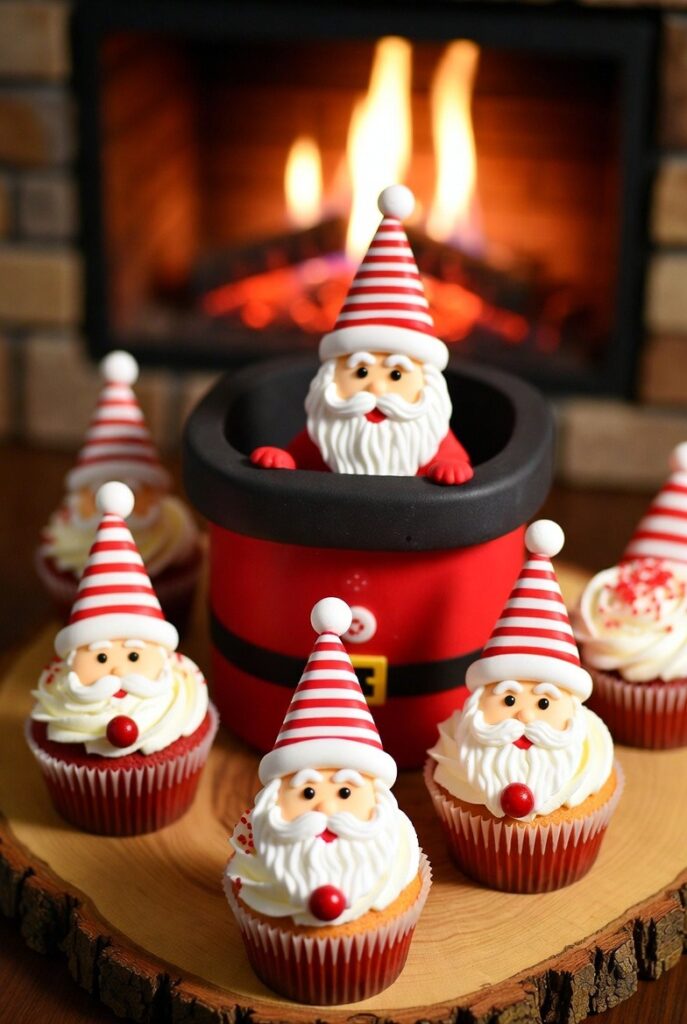
Santa stuck in the chimney cupcakes are a playful and creative holiday treat inspired by the classic Christmas imagery of Santa Claus trying to squeeze down a chimney. These cupcakes feature a cute Santa figure appearing to be stuck halfway down the chimney, adding a whimsical and humorous touch to your festive dessert table.
The cupcakes are usually decorated with fondant or icing to create Santa’s face and body, along with a ‘chimney’—which can be a cupcake liner decorated like brick or a chocolate piece—giving the illusion of Santa’s dilemma. This idea combines both fun and deliciousness, making it a perfect centerpiece for your holiday celebration.
Materials Needed for Santa Stuck in the Chimney Cupcakes
Before jumping into the baking and decorating, let’s gather all necessary materials to make this project a breeze. Here’s a comprehensive list, including quantities and where to find items.
| Item | Quantity / Size | Purpose | Notes |
|---|---|---|---|
| Cupcake mix (your choice) | Enough for 12-24 cupcakes | Base of cupcakes | From store or homemade |
| Cupcake liners | 12-24 | To hold cupcakes | Choose festive colors |
| Red fondant | 1 lb | Santa’s hat & suit accents | Available at baking stores |
| White fondant | 1 lb | Santa’s beard, pom-pom, trim | Soft and easy to mold |
| Flesh-toned fondant | ½ lb | Santa’s face & hands | For skin tone |
| Black fondant or black edible marker | As needed | Santa’s eyes & boots | Adds detail |
| Edible black ink pen | As needed | Fine details | For eyes and buttons |
| Orange fondant or food-safe marker | Small amount | Santa’s nose | For nose detail |
| Small candy or edible glitter | For decoration | Festive sparkle | Optional |
| Chocolate bars (e.g., Hershey’s) | 1-2 bars | To create chimney | Melted or in chunks |
| Royal icing or piping gel | For attaching fondant | Assembly | Use food coloring if needed |
| Piping bags and tips | 1-2 | Decoration | Small round tips ideal |
| Edible glue | Small amount | Attach fondant pieces | Food-safe |
| Food coloring gels | Assorted | Coloring fondant & icing | For custom shades |
| Toothpicks or small skewers | As needed | For shaping | Extra precision |
Tip: Always opt for high-quality edible products to ensure vibrant colors and good taste.
Step-by-Step Guide to Making Santa Stuck in the Chimney Cupcakes
Now that you have your materials ready, I’ll take you through each step of creating these adorable cupcakes. Follow along for a smooth and fun baking experience.
Step 1: Bake Your Cupcakes
- Prepare the Batter: Use your preferred cake mix or homemade recipe. I recommend a classic vanilla or chocolate base—both taste delicious and serve as a perfect canvas for decorating.
- Bake: Line your muffin tins with colorful or themed cupcake liners. Fill each about ⅔ full with batter. Bake as per the recipe instructions (typically 18–22 minutes at 350°F / 175°C).
- Cooling: Once baked, transfer cupcakes to a wire rack and let them cool completely. This step is crucial for stable decorating.
Step 2: Create the Chimney & Santa
- Chimney Base: Melt chocolate bars or use chocolate chips to make chimney “bricks.” Pour melted chocolate into small rectangular molds or pipe onto parchment paper in brick patterns. Let harden.
- Santa’s Head: While chocolate sets, mold Santa’s head and hands with flesh-toned fondant. Use small amounts of fondant for the face shape, rounded cheeks, and hands.
- Santa’s Hat & Body: Shape red fondant into a small hat with a white pom-pom at the tip. For Santa’s body, roll a small sphere and add tiny fondant pieces for arms and boots.
Step 3: Decorate the Cupcakes
- Base Layer: Pipe a thin layer of frosting on each cupcake. You may opt for white frosting to resemble snow or brick-colored frosting to mimic the chimney.
- Assemble Santa: Place Santa’s head on top of the cupcake, leaning slightly, as if he’s peeking out of the chimney. Attach with edible glue or piping gel.
- Add Chimney: Insert the chocolate brick piece into the cupcake, behind Santa’s head, to appear as the chimney. Alternatively, you can decorate the cupcake with a brick pattern made from fondant or frosting.
- Finish with Details: Use black fondant or an edible marker for Santa’s eyes and boots. Add a tiny orange nose if desired. Attach Santa’s hat and small hands using edible glue or piping gel for stability.
Tips for Success
- Practice Fondant Sculpting: If you’re new to working with fondant, practice shaping small pieces before decorating your cupcakes.
- Color Consistency: Use gel food coloring for vibrant, consistent shades.
- Chill the Fondant: Keep fondant refrigerated before working to prevent sticking.
- Use Small Tools: Dental pick or a crafting needle can help carve fine details.
- Work in Layers: Build up your decoration gradually, allowing parts to set before adding new ones.
- Personalize: Feel free to add accessories like tiny gifts, candy canes, or a Christmas message on your cupcakes.
Common Mistakes & How to Avoid Them
| Mistake | Solution | Explanation |
|---|---|---|
| Overworking fondant | Keep fondant covered when not in use | Prevents drying out and cracking |
| Using too much frosting | Use a small spatula or piping bag | Keeps decoration neat and prevents mess |
| Not cooling cupcakes properly | Fully cool before decorating | Avoid melting or smudging decorations |
| Squeezing too much chocolate | Pipe carefully to avoid excess | Ensures a tidy chimney look |
| Rushing assembly | Allow each part to set | Stability is key to look professional |
Similar Variations to Try
If you’re looking to mix things up or add your own twist, here are some fun variations:
- Santa in a Sleigh: Use graham crackers or cookies to build Santa’s sleigh and place it on top of cupcakes.
- Reindeer Santa: Replace Santa with Rudolph, adding a red nose and antlers.
- Santa Peekaboo: Create a cupcake with Santa hiding behind a chimney made from candy or fondant bricks.
- Christmas Tree & Santa: Incorporate mini Christmas trees as decorations alongside Santa.
Summary & Final Thoughts
There you have it — your complete guide to making adorable Santa stuck in the chimney cupcakes. These treats are not just festive; they’re a fantastic way to inject fun into your holiday baking. Remember, the key to great decoration lies in patience and practice. Don’t stress if your first few look a little quirky; the effort and holiday spirit are what truly count.
So, gather your ingredients, channel your inner decorator, and surprise your family and friends with these charming, tasty cupcakes. Happy baking, and may your Christmas be as sweet as these delightful treats! Keep spreading the holiday cheer, and I hope this guide helps you create memorable festive moments.
Enjoy your holiday baking, and don’t forget to share your adorable Santa chimney cupcakes on social media! Happy holidays!